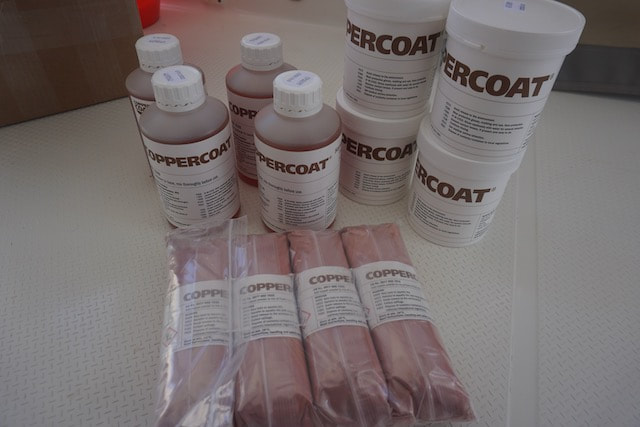
Itiki

  • Home
    • About Us
  • Our Boat
  • ITIKI tracker
    • Daily Log 2022/23
    • Daily Log 2021/22
    • Daily Log 2019
    • Daily Log 2018
  • Blog
  • Technical & Resources
  • Contact Us
  • Home
    • About Us
  • Our Boat
  • ITIKI tracker
    • Daily Log 2022/23
    • Daily Log 2021/22
    • Daily Log 2019
    • Daily Log 2018
  • Blog
  • Technical & Resources
  • Contact Us

itiki blog

Copp-er-ing it sweet

28/10/2022

0 Comments

 
Picture
3 parts to mix

ITIKI's Experience Applying CopperCoat

​We thought we were clever buying 10 litres of Micron 350 ablative antifoul in Martinique, knowing it was not easy to get in Grenada where we would be hauling out. Since then though, the decision to use CopperCoat was made so the quest began to get the materials to Grenada (well Carriacou to be precise) as they are not available locally.

What is CopperCoat?

Well basically it is a hard, non-ablative anti-foul paint. It consists of a 2-part resin which is mixed with a fine copper powder and applied in layers to the hull. It chemically cures over a period of a few days and then needs to be sanded to expose the copper that acts as the anti-foul. It starts off brown in colour but will go green over time as it develops, as all copper eventually does. Unlike a regular ablative anti-foul, it doesn’t rub off every time you clean the hull. Although we had applied a good quality anti-foul in Leros (Greece) only 12 months ago, a good deal of it was gone thanks to regular hull cleaning as well as the sargassum weed which has been haunting us through the Caribbean. CopperCoat can last 10 years and maybe longer, which is good as it is not cheap! Also as it doesn’t come off into the water it is far more environmentally friendly. Not something you would consider for a race yacht but perfect for cruising.
Picture
Sanded back to bare hulls
​Applying CopperCoat is quite a process. You need to calculate the amount of material you need, adding a little for wastage. It then needs to be applied in a single session with ideally around 6-7 coats, although as coat thickness may vary you just use up all that you have. Rain is not your friend during the application time so applying it at the end of the rainy season in the tropics can be challenging!
 
We sourced our CopperCoat from the UK as the cost, including freight, was much cheaper than getting it from the US. Application materials could be readily sourced locally. The hull needs to be well prepared in advance and taken right back to the gelcoat with absolutely all previous antifoul removed. The bulk of this was done whilst we were away and finished off once we got back. We masked up around earth plates and engine exhausts ourselves but left the rest to the experts.
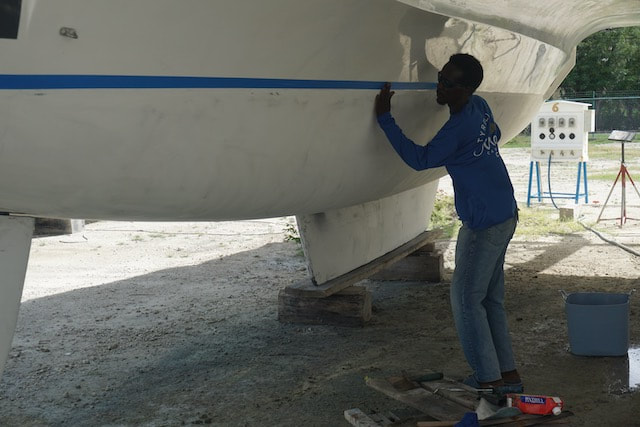
Picture

The Big Day

​When the day came, the forecast looked good and the skies were clear. Edwin turned up around 9am and it all seemed a bit too casual, even for a Monday. Two other guys joined him and he masked up whilst they did a wipe down of the hulls with Iso-propyl alcohol, with painting starting in earnest around 10am. We weren’t really clear at first what we should do and initially kept out of the way, but as progress seemed slow, particularly with the small rollers, we got involved with mixing and cleaning up the trays etc. They got into a bit more of a rhythm after that and it seemed more efficient. At the end of the 5th coat we still had a full 4L left and although they were pretty reluctant to get the 6th coat on we negotiated some overtime, bought some cold beers and they continued on. Just as we were checking for any touch ups and we were contemplating another round of cold beers, we looked up to see a dirty black cloud. First drops of rain were soon felt and so followed a mad rush to get the plastic sheet deployed to cover the last coat. Tropical rain squalls are heavy but thankfully short lived. The transoms got a fair bit of water running down them, as they take the run-off from the decks. Also a few streaks elsewhere but not too bad. Apparently it was just the epoxy of the last coat or two which has washed away. We can sand it and touch it up tomorrow and Keith can do this. Also need to turn the rudders and get the spot that was underneath as well. Disappointing end to the day but they have done a good job.
Picture
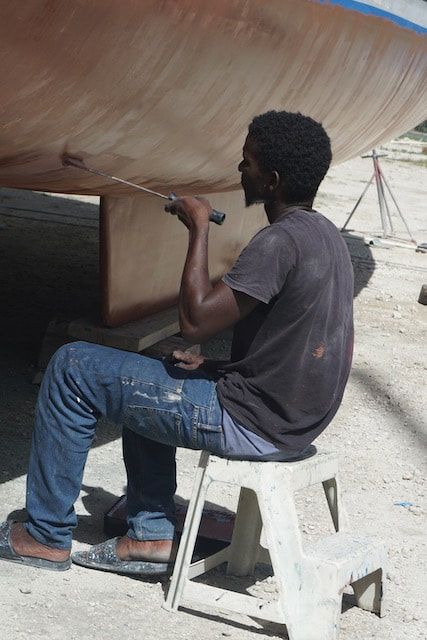
​Three days later Edwin returned to sand the hulls. This removes a layer of epoxy and exposes the Copper. This took the best part of the day to do with one person. Once ITIKI is in the lifting cradles we will pop a layer of regular anti-foul on the bottom of the keels, which she has been resting on. And so we are good to go! Now we watch for the hull to go green, but this time not due to algae growth!

Big thanks to Edwin and the folks at Tyrell Bay Marina for expert work in applying the CopperCoat as well as assistance in getting the materials into the country. Anyone want to buy some Micron 350??

TIPS & Lessons

There is plenty of information on the CopperCoat website, including videos. These are our lessons from the day.
  • For a catamaran, 4 painters and 1 mixer would be ideal. We did it OK with 3 painters, 1 mixer/ cleaner/gopher. It was at least 30oC so theoretically we only have 20 mins life for the mix but in reality it was probably a little longer than that.
  • Start early – 9am was a bit too late, especially as we had not masked up or done the alcohol wipe down, and painting did not start in earnest until 10ish.
  • Use a combination of small and large mohair rollers – we used all small (as the painters requested), which obviously takes longer. Larger rollers will be quicker but can be heavy when laden with copper and can’t reach into small corners.
  • Masking could have been done the day before, (that was a Sunday though so it didn’t happen) but the alcohol rub needs to be done immediately before.
  • Prepare the plastic curtain in advance, taping it up out of the way such that it can be deployed quickly if there is any chance of rain. The rear transoms (or any areas where rainwater runs off) need to be particularly well protected. In our case the transoms get all the run off from the decks. Even the retrieval line for the swim ladder can act as a wick for water to get through the tape, so tape below that.
  • Provide chairs or stools for the painters, our hulls are low and wide so can be easily reached when seated and it saves back ache for the painters
  • Painters need to divide the hulls into sections, as after the first couple of coats it is not so easy to tell where the coats have been painted. The paint is slightly pink when it goes on but quickly changes to brown. It is a good idea for the gopher or mixer to check after each coat to ensure there are no missed patches.
  • Have regular cold drinks and sandwiches available as painters can’t stop for too long. Previous coat must still be tacky, but not dry, in order to bond well with the next coat. About an hour between coats is ideal, but in our case as soon as one coat was done the next one started.
Materials
  • Iso-propyl alcohol – 2 x 2L cans
  • Clean rags – about 2-3 T clean shirts
  • 4 rolls of 2 inch 3M blue masking tape (should be best quality)
  • Roll of plastic sheeting, thicker is better but the thin stuff is OK if good quality (ie 3M)
  • 2-3 hard roller trays & 8 tray liners – the latter can be rinsed and re-used a few times
  • 4 x 2.5L mixing bowls – can also be rinsed and re-used
  • Paint stirrer – flat piece of wood in our case
  • 16 mohair mini-rollers / 4 larger ones or a combination
  • Roller handles
  • Copper coat – ordered 20 x 1L used 18.5L for 6 coats
  • Safety/protective equipment
Labour
  • Hull cleaning & preparation                                      A$1,246
  • Application                                                                    A$996
  • Sanding/activation                                                       A$249

 
Materials
  • Coppercoat (20L) Inc Freight                                      A$3,659
  • Import tax & local transport                                       A$207
  • Sanding materials (hull prep., activation)               A$438
  • Painting materials (rollers, tape, trays etc)              A$368

Total: AU$7,163
0 Comments


Leave a Reply.

    Author

    After more than 7 years of (minus time off for Covid) and more than 30,000nm Lynda has finally got the hang of this cruising life. Now back in Australian waters, with a home base in Tasmania, ITIKI and crew are enjoying coastal cruising.

    Archives

    May 2025
    April 2025
    March 2025
    June 2024
    May 2024
    March 2024
    January 2024
    December 2023
    November 2023
    October 2023
    September 2023
    August 2023
    July 2023
    June 2023
    May 2023
    April 2023
    March 2023
    February 2023
    January 2023
    December 2022
    November 2022
    October 2022
    September 2022
    July 2022
    June 2022
    May 2022
    April 2022
    March 2022
    February 2022
    January 2022
    December 2021
    November 2021
    October 2021
    September 2021
    August 2021
    November 2020
    July 2020
    May 2020
    April 2020
    February 2020
    December 2019
    November 2019
    October 2019
    September 2019
    August 2019
    July 2019
    June 2019
    May 2019
    April 2019
    March 2019
    January 2019
    December 2018
    November 2018
    October 2018
    September 2018
    August 2018
    July 2018

    Categories

    All
    Our Cruising Adventures

      Enter your email to receive notifications of new blog posts

    Subscribe to Newsletter

    RSS Feed

© Copyright | 2020 Itiki On Tour​
Picture
Follow us: