Taking lines ashore is a technique used mainly in Greece and Turkey, as well as some places in Croatia, where swing anchoring is not possible. This may be due to the crowded nature of the bay, the steep drop-off close to the shore, or both. Mastering this technique means you can enjoy the many free and natural anchorages around the eastern mediterranean.
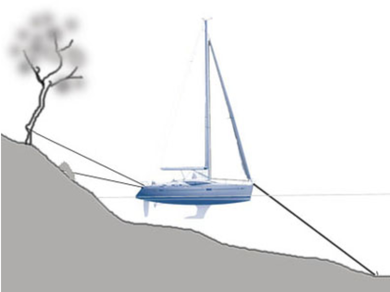
Photo: Copyright L Camillo 2009
|
Having become dab hands at med-mooring on a quay with lazy lines (not!) the next challenge was med mooring to a quay using your anchor and own mooring lines. That was certainly excellent preparation, because as you head further east you get the opportunity to med-moor to the shore of a bay, attaching yourself to a rock or tree.
This requires some preparation and planning. It is definitely worthwhile having some dedicated materials, rather than trying to improvise and use your mooring lines. |
Materials:
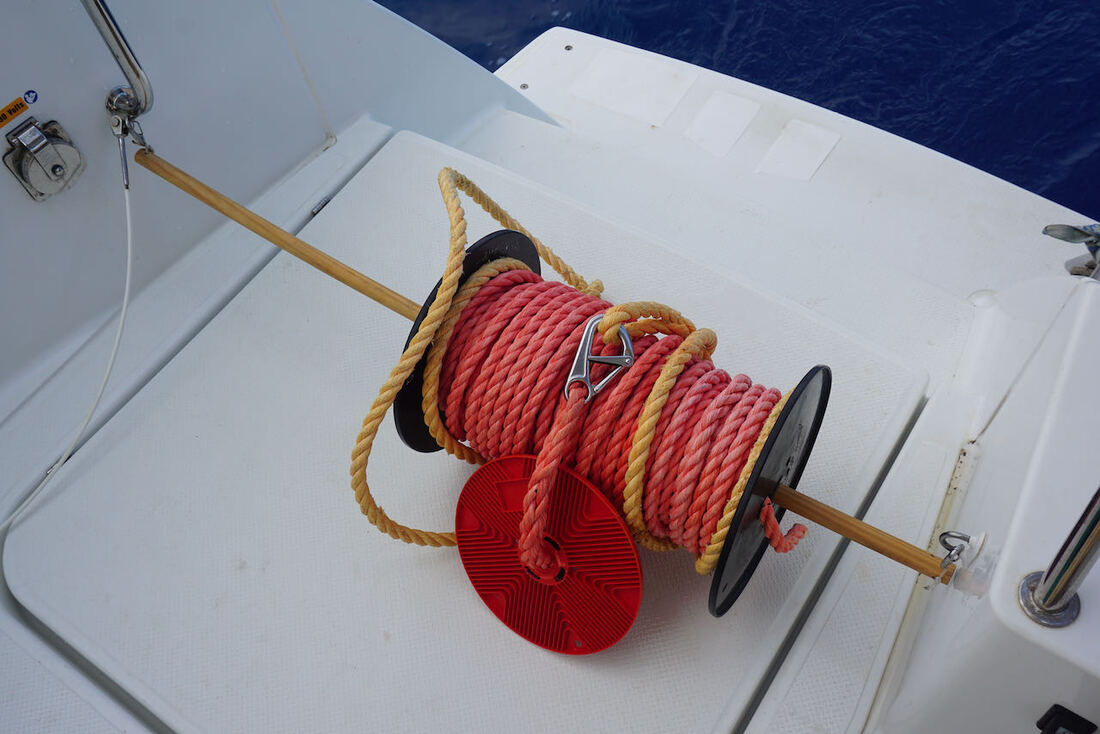
For the warps we have chosen 2 x 50m lengths of 16mm polypropylene, laid, float rope. You could equally use plaited however it is easier to do eye splices with laid rope. We have found 50m is long enough 99 percent of the time. On one occasion we did extend one of the warps by attaching another line. That was a temporary move in a crosswind and once we had the 2nd line on a we could reposition and shorten up both lines, removing the extension. We are usually anywhere from 20-30m off the shore.
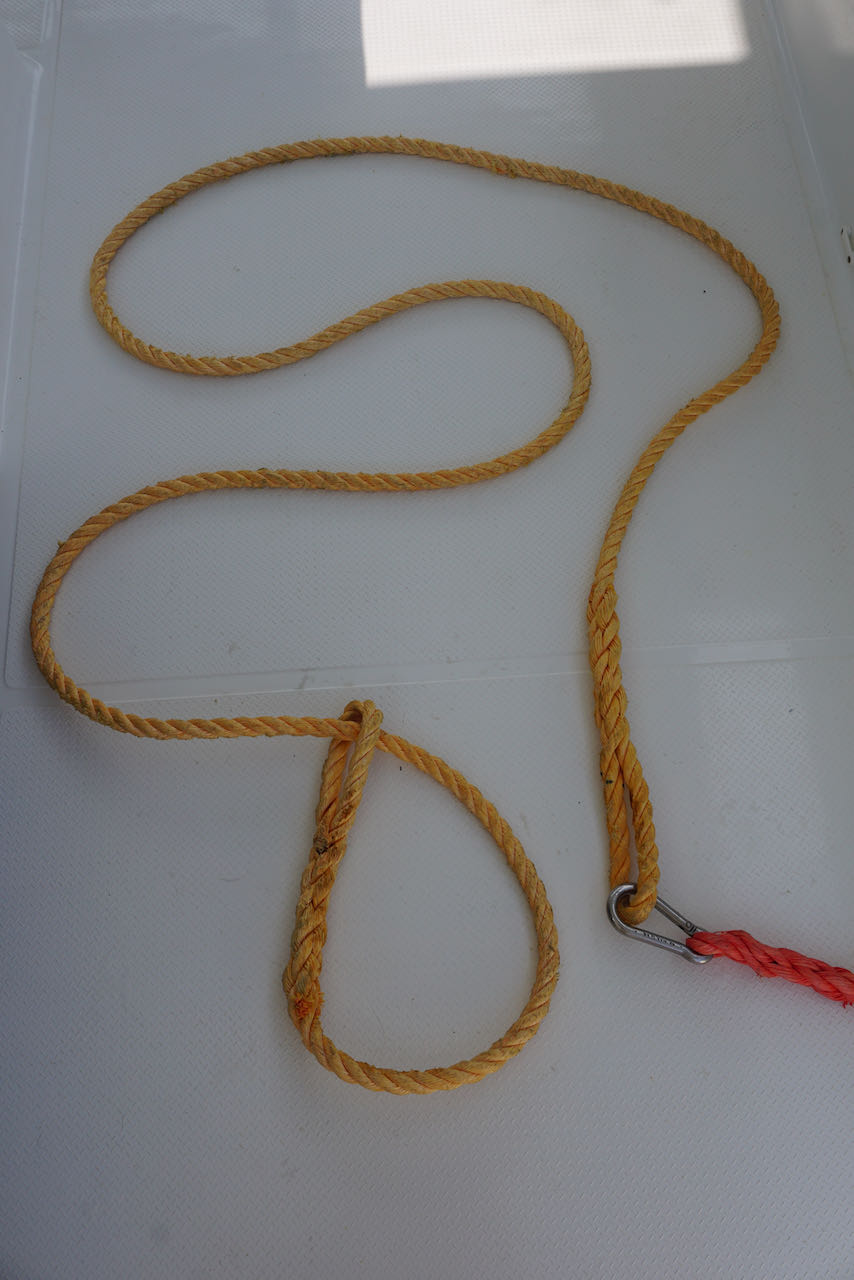
In addition to the warps we have two separate lines approximately 4m of 18mm poly, laid float rope, with an eye splice at each end. To each of these we attach a marine grade harness clip or carabiner. These shorter lines are threaded through the eye splice in the warps and form the loop that is used to go around a rock, tree or bollard on the shore. Depending on the length required, it can be clipped back onto itself or back to the warp. The short section of rope goes around rocks which may be sharp, so inspect it regularly for chafe and replace when necessary. We carry spare line to make replacements if needed.
For the warps we have chosen 2 x 50m lengths of 16mm polypropylene, laid, float rope. You could equally use plaited however it is easier to do eye splices with laid rope. We have found 50m is long enough 99 percent of the time. On one occasion we did extend one of the warps by attaching another line. That was a temporary move in a crosswind and once we had the 2nd line on a we could reposition and shorten up both lines, removing the extension. We are usually anywhere from 20-30m off the shore.
In addition to the warps we have two separate lines approximately 4m of 18mm poly, laid float rope, with an eye splice at each end. To each of these we attach a marine grade harness clip or carabiner. These shorter lines are threaded through the eye splice in the warps and form the loop that is used to go around a rock, tree or bollard on the shore. Depending on the length required, it can be clipped back onto itself or back to the warp. The short section of rope goes around rocks which may be sharp, so inspect it regularly for chafe and replace when necessary. We carry spare line to make replacements if needed.


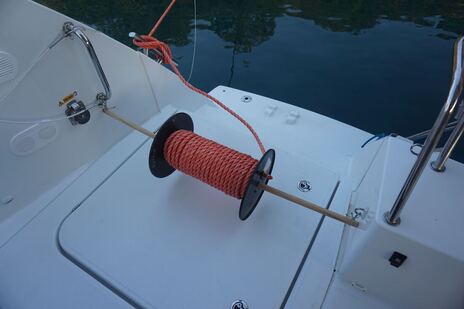
Our patented rope holder
|
|
Below: A clip showing the shorter loop
|
Choose a bright colour like white, yellow or orange as other colours may be hard for other boats or paddlers to see. Materials will be cheaper at a local fishing co-op or hardware store in the fishing harbour than in a chandlery. We have scrounged 2 rope spools both for storage of the warps and also for ease of deployment when taking them ashore. More on that later. Another useful addition are some rat guards, to prevent unwanted guests. Again we have used a scrounged rope spool for these. More on that later too! |
Line and rat guard in place
|
Alternative materials:
Some people use webbing straps for their lines ashore and these can stow neatly on a reel on the side of the boat. The downside is that these do not float and can be heavy to swim with when they get wet. We have also seen some cruisers use a wire cable or even chain for the shorter section that goes around the rocks. No chafe, however heavy and uncomfortable to swim with and not as easy to adjust the length.
Some people use webbing straps for their lines ashore and these can stow neatly on a reel on the side of the boat. The downside is that these do not float and can be heavy to swim with when they get wet. We have also seen some cruisers use a wire cable or even chain for the shorter section that goes around the rocks. No chafe, however heavy and uncomfortable to swim with and not as easy to adjust the length.
|
Picking your spot
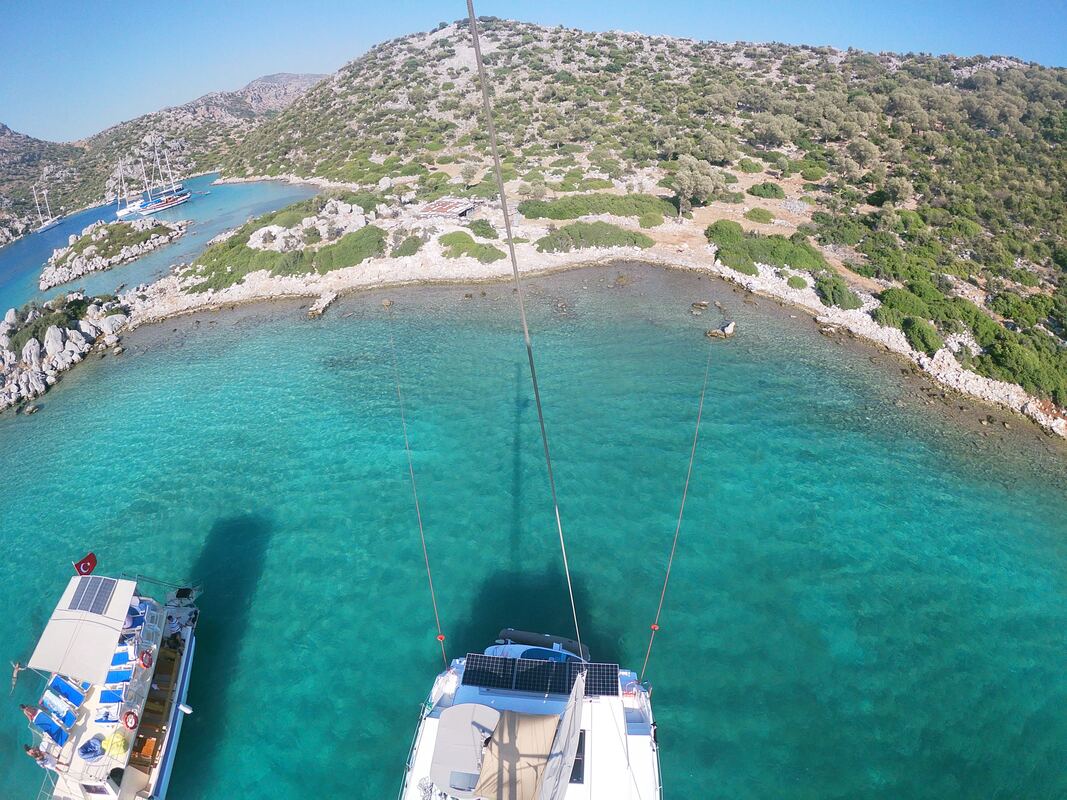
Choose your position in the anchorage so as not to cross anchors with other boats, either on the opposite shore of a narrow anchorage, or either side of you. Most owners will come and watch you manoeuvre and are only too happy to point out where their anchors are. Scan the shore for suitable rocks or bollards to attach lines to. In general trees should be avoided due to potential damage - it is also illegal in some places. You want no more than 45 degree angle out from your boat for the lines. Some people cross their own lines over each other to achieve this. You may also have to cross over other people's lines but try to make sure they are not touching which could cause chafe. |
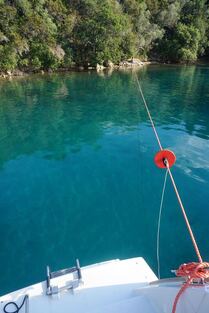
Coldwater Bay, Turkey. It's a treat to have this gorgeous spot to ourselves!
|
So that leads us to the process
Try to reverse in at right angles to the shore, dropping your anchor in no more than 25m when in deep water, which may be 2 boat-lengths out from your final position. It is best to control the anchor from the foredeck initially so you can make sure it is running freely but the helm will need to call the depth for you. You wont be able to see the bottom so you are reliant on research and reviews as to what is down there! Once the anchor hits the bottom you can start gently motoring back at the pace you are paying out the chain as you want to keep a reasonable amount of tension on it but not drag it. When you are roughly in position, put the gears into neutral as your swimmer enters the water, then your swimmer or paddler can head to the shore, back in gear now you can control the boat whilst the lines are secured. Always fit the windward line first.
As you can see above, we have the rope spools for the warps which are attached horizontally across each transom with a converted broomstick. It is important to ensure lines can run freely, so the swimmer is unimpeded. As we leave the rat guards on the lines permanently, these can cause issues so the skipper needs to make sure these are tossed into the water behind the swimmer.
|
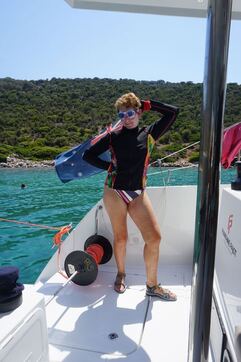
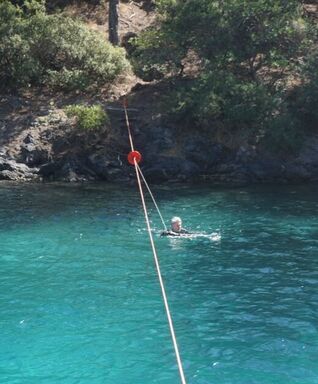
I normally swim the lines ashore, although have seen people do it on SUPs or a smaller dinghy. For swimming I thread the shorter length through the eye splice at one end and clip the other end onto the eye splice in the end of the warp. I pull this over my head and one shoulder so that it sits like a seat belt around my trunk as this is easiest for swimming.
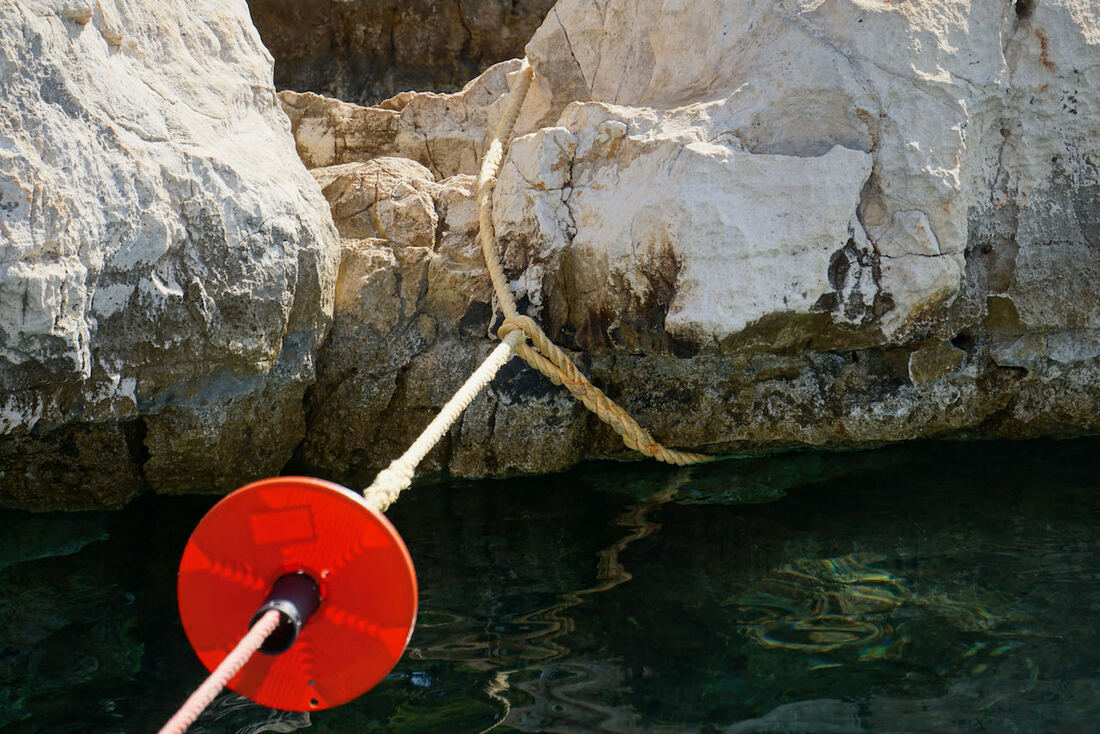
It is advisable to wear reef sandals and gloves to protect you from sharp rocks and see urchins. I find goggles helpful too so I can see what is on the bottom and where to put my hands and feet as I stand up. Once you get to the shore you may have to re-evaluate your choice of rock. Choose a reasonably large one that isn't going to budge and loop the short section of rope over it. If you can tuck it under any bumps or bulges in the chosen rock this is a good thing, as it will help keep it in place as you tighten the rope. Once that is secure the skipper can start tightening it. |
I will then swim back towards the boat to get the second rope, which the skipper may be kind enough to toss to me. You want to be careful not to have too much loose rope in the water as you may need to reposition and you dont want it ending up around the props.
Once both warps are attached to the shore the skipper will tighten these and the anchor as well. We do put a retainer onto the anchor chain so that the force can be removed from the windlass, so for the most part the adjustment is done to the rear lines. It's good to sit and watch your handiwork for a while as the anchor settles. As the boat "swings", the leeward line will slacken and can be tightened at the boat end.
Note that if your anchor comes unstuck it is best to retrieve the shore lines and start all over again from scratch, rather than trying to fix the situation with lines and a swimmer in the water, and all of the anchorage watching you! Alternatively you can find another spot and pretend you meant to move...
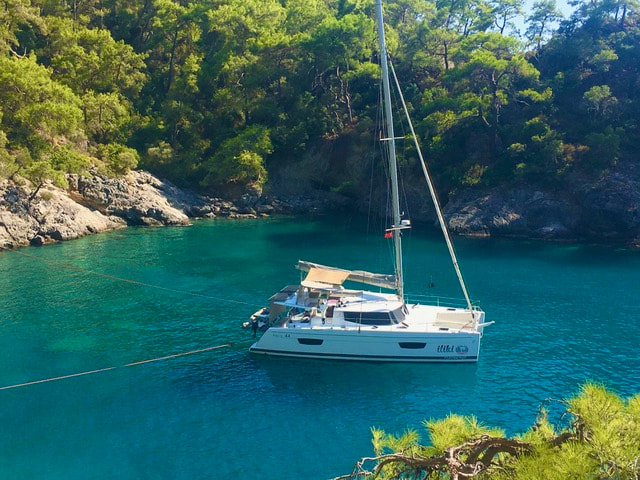
Above: In a shallow bay or inlet its great to have a catamaran and tie ashore. You can own the space.
Weighing anchor
You always hope you dont have to be doing this in the middle of the night when an unexpected storm comes through and dislodges your whole arrangement...
Leaving the anchorage is fairly simple though.
You always hope you dont have to be doing this in the middle of the night when an unexpected storm comes through and dislodges your whole arrangement...
Leaving the anchorage is fairly simple though.
- remove the bridle/retainer from the anchor
- swim/paddle ashore and signal the skipper too loosen the warp at the boat end so that you can loosen and unclip it
- release the leeward line first, the skipper can retrieve it
- swim/paddle across to release the windward line using the same process
- the skipper will haul in the line as quickly as possible whilst also giving you a tow back to the boat
- up anchor as usual and off you go!
- oh and tidy up the pile of float rope on your transoms!
|
I smell a rat!
Certain locations in Greece and Turkey are notorious for rats. The little fekkers can walk a tightrope along your lines to get aboard. They can also swim like Thorpie and climb your anchor chain! Anything to get a feed and they love nothing more than feasting on electrical wiring! You definitely want to keep them off your boat, so you need to find a foolproof way to protect your lines and close off your the anchor exit point. You can buy rope discs at chandleries or make them yourself. Remember they are clever buggers so you need to ensure that they cant just push the disc flat horizontally along the rope and run straight over the top of it. Some people use water bottles with the bottom cut off. We cut a small rope spool in half, leaving the part of the middle tube section on it. This means the disc part can't be laid horizontal by Mr Rat. These are threaded over the lines ashore. Realising that these devices can slide along the lines and get a little too close to the boat, we use a short piece of shock cord to tie these onto the line at a suitable distance from the boat. The anchor slot can be covered from the inside for the Thorpie rats. A polypropylene cutting board can be modified to make an excellent cover. |
Be sure to involve your guests in the fun
of deploying the rat guards... |