We wanted to have at least 1000W of solar given our appliances and anticipated usage. We also wanted solid panels so that they could be fitted away from the deck to allow some airflow for cooling. Eventually we chose the SunPower X22-360 (22% efficiency) x 3 which at 360W each, will give us 1080W and fit reasonably neatly behind the traveller.
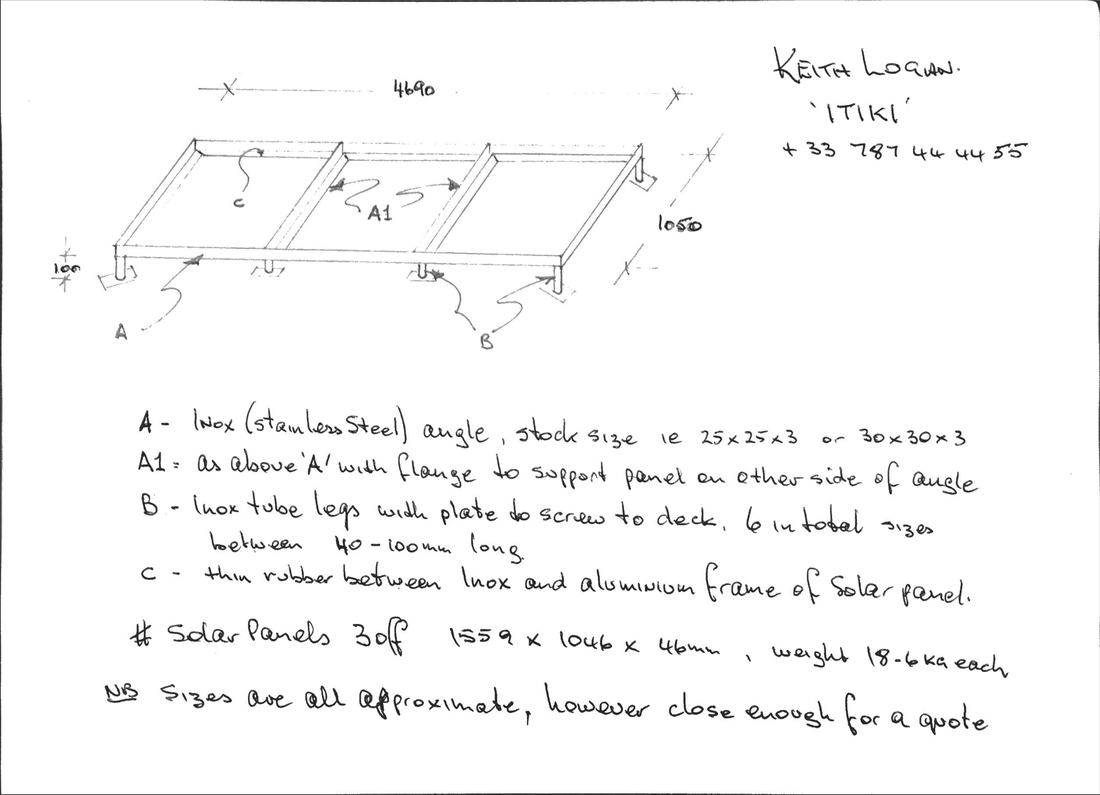
We have designed a basic stainless steel frame which has a little overhang at the back. We were able to use the overhang to extend the cockpit are, attaching some sunshades which go behind the rear cockpit lounge and provide some extra privacy when Med moored.
Panels were wired in parallel to a single Victron 150/70 Charge Controller (with bluetooth).
The frame is very simple, made from stainless angle, with tubular legs. The legs were fabricated at right angles to the feet and the fabricator was able to cut and fit each one allowing for the slope of the roof of the cockpit at each individual position.
Using angle and dropping the panels in means you need to ensure you use some buffer to avoid contact between the two metals. We initially used some foam tape, but eventually changed this to small pads of neoprene washers around each screw hole. We also drilled some drainage holes to ensure rainwater (and dirt) would not collect between the stainless frame and the edges of the panels as this would lead to corrosion.
The installation of the panels ended up being a tale of 3 countries (and 2 continents!) Check the blog for a blow by blow description and more detailed photos of the fitting of the panels at the very end.
| solar_pane_drawings_horizontal.pdf | |
| File Size: | 296 kb |
| File Type: | |
Big thanks to Peter Libretto, FP Lucia owner and one of Australia's leading Solar Panel experts, for fantastic advice. Also to Lindal Pitcher (WWSM member and fellow Helia owner) for comparing notes over FB Messenger for the frame and mounting of the panels!


